 Up
Up
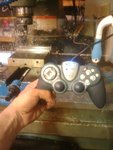
Here's how to set up a Saitek P880 joypad with EMC2 and Ubuntu Hardy. Please refer to the excellent webpage http://wiki.linuxcnc.org/emcinfo.pl?A_New_Approach_For_Using_Joypads_With_EMC2. I will distill his suggestions into simplified code.
  # Do not plug in your joypad yet. If it is plugged in, unplug it.
  # Exit EMC2 is you are running it.
  #

  echo Please cd to your directory with INI files.

  # Install tools needed to comiple EMC2 component "joyhandle"
  sudo aptitude  -y install  build-essential emc2-dev

  # Get "joyhandle"
  GET http://wiki.linuxcnc.org/uploads/joyhandle.comp > joyhandle.comp

  # Compile and Install "joyhandle"
  sudo comp --install joyhandle.comp

  # Set up udev permissions
  echo 'SUBSYSTEM=="input", mode="0660", group="plugdev"' | sudo tee -a /etc/udev/rules.d/50-input-permissions.rules

  echo Now you can plug in your Saitek P880
Add this to your directory with halfiles into a file saitek.hal:
################################ Saitek P880 Joypad

#    Hal configuration file to move a cnc machine using a joypad using joyhandle component

#    Copyright 2008 Paul Willutzki <paul[at]willutzki[dot]de>
#    Minor changes by Igor Chudov, igor AT chudov DOT com.

#    Licence: GPL

#    Version 3

#    This Hal-File needs the joyhandle component.
#    This uses the following formula for a non linear joypad movements:
#    y = (scale * (a*x^power + b*x)) + offset
#
#    The parameters a and b are adjusted in such a way, that the function starts at (deadband,offset) and ends at (1,scale+offset).
#    Negative values will be treated point symetrically to origin. Values -deadband < x < +deadband will be set to zero.
#    Values x > 1 and x < -1 will be skipped to +-scale+offset. Negative scale values invert the movement.
#    With power one can adjust the nonlinearity (default = 2).
#    Default for deadband is 0.
#    Valid values are: power >= 1.0 (reasonable values are 1.x .. 4-5), 0 <= deadband < 0.99 (reasonable 0.1). If you use high deadbands (>0.5) you need higher power values to smoothly start at (deadband,offset).
#    The additional offset component can be set in special cases (default = 0).
#    All values can be adjusted for each instance (joypad axis) separately.

#    Please take also a look at the manpages for johandle.

#    Insert the following lines in the INI-File (section [HAL])
#    HALUI = halui
#    HALFILE = saitek.hal

# Load the hal_input component that creates pins for axes and buttons
# See man hal_input for details and finding input devices

loadusr -W hal_input -KRAL SAITEK

# load joyhandle component and attach to threads (in this case 3 instances)
loadrt joyhandle count=3
addf joyhandle.0 servo-thread   # x
addf joyhandle.1 servo-thread   # y
addf joyhandle.2 servo-thread   # z

setp halui.jog-speed   30	# desired maximum jog speed mm/min

# --Start-- These parameters ara used to set up joyhandle
setp halui.jog-deadband   0.	# important: default value is 0.2, that would override joyhandle.deadband
setp joyhandle.0.power 3.	# select nonlinearity to handele low jog values
setp joyhandle.1.power 3.
setp joyhandle.2.power 4.	# in my case the z-axis is set up more sensitive
setp joyhandle.0.deadband 0.1
setp joyhandle.1.deadband 0.1
setp joyhandle.2.deadband 0.1
setp joyhandle.0.scale  1.
setp joyhandle.1.scale -1.	# negative values invert jogging
setp joyhandle.2.scale -0.75    # in my case the z-axis is scaled to lower speed
# --End--

# connect hal_input to halui via joyhandle (in case use your own axes-names)
net velX input.0.abs-rz-position => joyhandle.0.in
net velXout joyhandle.0.out => halui.jog.0.analog
net velY input.0.abs-z-position => joyhandle.1.in
net velYout joyhandle.1.out => halui.jog.1.analog
net velZ input.0.abs-y-position => joyhandle.2.in
net velZout joyhandle.2.out => halui.jog.2.analog

# connect hal_joypad directly to halui without joyhandle (in case use your own axes-names)
# -- do NOT use!
#net velX joypad.axis.3 => halui.jog.0.analog
#net velY joypad.axis.2 => halui.jog.1.analog
#net velZ joypad.axis.1 => halui.jog.2.analog


# [BUTTON-SAMPLES] use your own joypad pin-names
#One button sample
net spindleOff input.0.btn-thumb2 => halui.spindle.stop
net spindleOn input.0.btn-trigger => halui.spindle.start


# Cycle Start -- input.0.btn-top2
# Feed Hold   -- input.0.btn-pinkie
net cycleStart input.0.btn-top2   => halui.program.resume
net feedHold   input.0.btn-pinkie => halui.program.pause
Add this to the [HAL] section of your main ini file:
  HALUI   = halui
  HALFILE = saitek.hal
